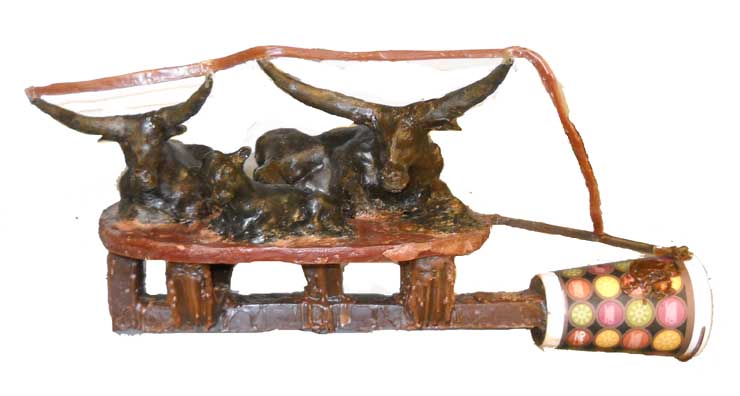
Bronze Casting - Wax Models on the Grid

This model is pretty complex - and will produce a heavy sculpture since it is mostly solid. As we said earlier, a hollow sculpture would probably have been better, but that's the way it goes. Besides suppliers of bronze have to make a living, too.
Here you should probably see what is going on. We will create another mold around the wax model, but a mold that will withstand the 2200 degree Fahrenheit of the molten bronze. But first you have to attach the wax model to a sprue through which the molten bronze will be poured. To do this you take a wax sprue and attach it to a paper cup (plastic cups should not be used because in the "burn out" they don't burn cleanly and produce noxious fumes). The grid you see here is to support the model. For simpler sculptures a grid is not always necessary. Here, though, with the horns, it is best to keep the model setting upright. You also have to add vents - the line attached on the horns - so the air won't get trapped in the mold and you won't get bubbles producing gaps in the final bronze cast.
The next step will be to cover the wax model - with the paper cup and all - with a ceramic formulation and then a layer of sand. These two layers will dry and produce the shell covering the wax model. More on the next steps if you click on the NEXT button.