Bronze Casting - Step 4
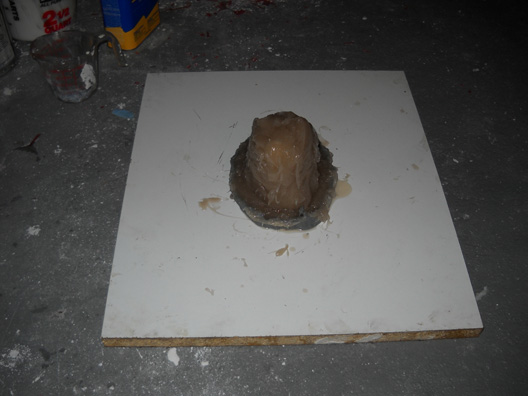
Making the Mold: Inner Mold Complete

This shows the final inner mold complete. Obviously you couldn't make something like this by brushing on a thin liquid unless you wanted to take a long time (latex, as we said, does require multiple layers). So with urethane in the layers after the first one, you need to have a thicker rubber formulation.
Now there are "brushable" liquids which are thixotropic - that is when you mix parts A and B the combined mixture thickens up when it sits still. But as you brush it on it thins down but then goes back to being thicker when the brushing stops. That way the liquid doesn't run off the statue as much as the thinner "pourable" rubbers. An alternative is to add a thickening agent as was done here. The thickener here was fumed silica which is extremely fine silicon dioxide powder. You don't work with this stuff lightly - no joke intended.
When working with fumed silica you must wear proper respiratory protection. A minimum would be a dust mask but a filter mask is really what you should use. Fumed silica is so fine it puffs up in billows like smoke and floats around in the air. It not only makes a mess but if it gets into your lungs, it just stays there. So if inhaled it is extremely hazardous to your health. It can cause not only silicosis - essentially black lung disease despite the color - but also lung cancer. So you not only must protect yourself with proper equipment, but make sure you handle the silica where the dust will not float around and expose friends and family. In fact, when the silica was added to this batch of rubber the artist, wearing a filter mask, stepped outside to do the mixing. Given the fact that there was snow on the ground and it was below freezing is an indication of how seriously you must take the warnings.
But the fumed silica does thicken the liquid rubber and the degree of thickening (of course) depends on how much you add. So you can create anything from a pourable but fairly thin liquid to a thick paste. In any case, the rubber is now thicker than before and covers the model more effectively so that less pools onto the surrounding surface and more sticks on the model.
This picture shows the final rubber mold after three layers: the first thin layer, a second "thickened" layer, and the final thick paste. The last coat was mixed up to the consistency of peanut butter - spreadable but without any real flow. You can then smooth the final layer into a nice convenient shape. Some artists take pride in their molds as much as the final sculpture.
Finally using a rubber which has been thickened to the same degree as the third layer, you need to stick on a ridge wherever you plan to divide the mold. That's because as we see on the next step you need to add shims. Some mold makers make the ridge as part of the third layer but other prefer let the layer cure and then make up a little more rubber just for the ridge. A fault of this mold is the ridge is a bit too small. But it was still serviceable.
A second fault here is that the mold is really thicker than it needs to be. But if you err, a bit thicker is a better than too thin. Usually.